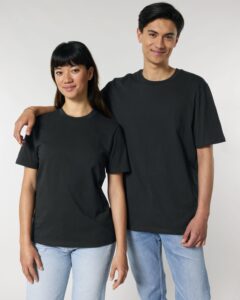
Top 10 Considerations when Ordering Printed T-shirts
There are loads of options when it comes to purchasing printed T-shirts for an event or business. If you’re nearly ready to put together a custom order, it might be a good idea to take into account the following 10 points. Hopefully making the process easier, while being sure the finished product fits your needs.
 1. End Use: Are you looking for promotional or giveaway T-shirts? Will the T-shirts be used as uniforms for your employees? Or, are you planning to sell them as retail items? Defining the purpose of the garment is very important and sets the tone for subsequent decisions, including the choice of fabric and budget allocation.
2. Target Audience: Who will be wearing the printed T-shirts? Are they primarily for Men, Women, or Unisex? Consider the age demographic and style preferences of your target audience. This could influence everything from the design, style or fit and on to the choice of t-shirt colours. You want your customers to wear them time and time again!
3. Brand Image: What image or message do you want your printed t-shirts to convey? Do you want a vintage or contemporary look? Complementary or vibrant? It’s important that the design reflects your brand identity and the nature of your products or services. ‘Pantone® solid coated references’ are important when designing artwork and when a specific colour needs to be matched to your brand.
4. Representing Your Brand: How prominently should your brand logo, name or product feature on the t-shirts? The size and placement of your branding should align with your brand strategy and the intended purpose of the final garments.
5. T-shirt Quality: Is fabric content a priority for your printed t-shirts? Maybe you’re considering the sustainability of the products you choose? Selecting the right fabric is also the foundation of most printing processes and will impact the overall quality and make sure that design stays looking crisp for longer!
6. Turnaround Times: Is there a specific deadline for the printed t-shirts, maybe an upcoming event? Consider the order process and production times required for different printing techniques, some may take longer than others to complete. Add-on services such as tagging and folding may also extend the turnaround times.
7. Durability: Will the T-shirts be subjected to high levels of wear and tear? Do they need to withstand frequent washing cycles? Choosing a durable and/or heavyweight fabric, plus a suitable printing method is essential to ensure the longevity of the printed t-shirts. Luckily, we’ve done most of the hard work for you. The brands we supply have been carefully selected to ensure great printability along with long-lasting comfort and washability.
8. Artwork: Ensure that the artwork fits your brand identity and is suitable for your choice of garment. Maximum print sizes might not always be the right choice. Extra large designs can feel heavy on some T-shirt fabrics. Do you have print ready artwork or designs, or do you need assistance from a graphic designer? Supplied artwork will need to meet printing requirements or this could cost you time and sometimes money to fix.
9. Budget: Have you worked out how much you want to spend on your t-shirt printing project? Consider the cost implications of different printing techniques, promotional or premium options, quantities and design parameters to stay within your budget while achieving your goal.
10. Future Orders: Are you looking for a one-off order, or do you anticipate reordering the same t-shirts in the future? Planning ahead and bulk ordering can often result in cost savings, so consider your future needs when placing your initial order.
Click for Artwork Guidelines
Click for Screen Printing Sizes
Feeling overwhelmed? No need to worry, we can help and talk you through the possible print techniques best suited to your needs so you don’t end up disappointed. Contact us for expert guidance, from idea to end product.

Choosing The Best T-Shirt For Screen Printing

You’ve got a great idea, amazing new designs but you’re confused about which T-shirt to choose and how to print them. Screen printing is still the most popular method of transferring designs onto T-shirts, it’s the most versatile and durable print option available. It’s a great way to create custom garments for events, promotional products for business or for new and established clothing brands. However, choosing the best T-shirt to for screen printing is essential for achieving great results. In this blog post we’ll discuss some key factors to consider when choosing a T-shirt for your designs. Luckily, there are many options available. Continue reading and we’ll try and explain, hopefully helping you to make the best choice for your brand.
Table Of Contents
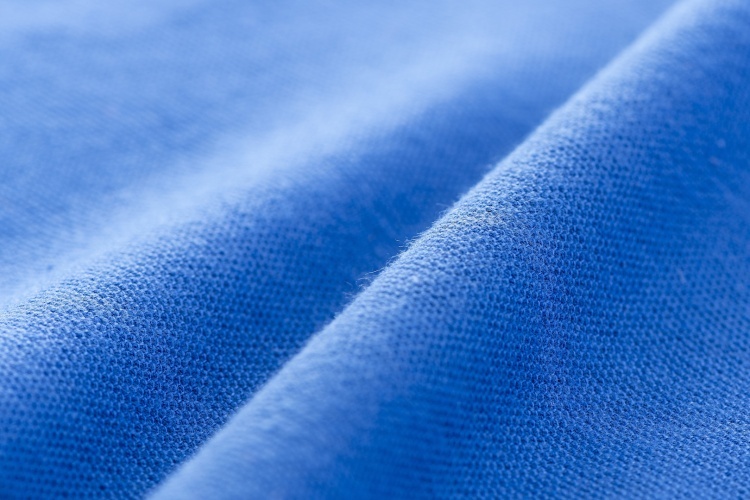
Fabric
The first thing to consider when selecting a T-shirt for screen printing your brand designs is the fabric. The most commonly used material for T-shirts are cotton, polyester, and a blend of both. However there are some lesser used such as tencel or bamboo. Cotton (especially organic cotton) is the most popular choice because it’s comfortable, breathable, and has great printability. Polyester, on the other hand, is durable and lightweight, although it can be more challenging to print. Blended fabrics can offer a mix of both (two fabrics) or even three (tri-blends). The choice of fabric will depend on the customer preference and the end use. Fabric content is generally split into two sections.

Cotton
Still the number one fabric choice for most people due to it’s durability, comfort and natural qualities. Cotton is the perfect substrate to print and a variety of different inks and techniques can be used to achieve the desired finish. From bold, simple one colour designs, to soft discharge inks, through to complex simulated process artwork. Cotton is the first choice for many. However, if we delve a bit deeper we realise that not all cotton T-shirts are created equally. We’ve broken this down into 3 easy to understand sections below.
Types of Cotton T-shirts:
1. Basic T-shirts are more often than not made with carded open end fibres. Although there is nothing wrong with them (especially if you’re on a budget), some can be a bit ‘fuzzy’, prone to shrinkage and can lose their shape slightly.
2. Better T-shirts are usually made using combed ring-spun cotton. They provide a great surface to print, hold their shape and provide comfort to the wearer. Organic cotton is more widely available than ever and a great choice for any brand.
3. Best T-shirts are again made with combed ring-spun cotton but might be a heavier weight fabric or a different style to the regular T-shirt. This could be organic cotton, an oversized style or T-shirt with a pocket. They might be described as a bit more ‘high-end’.
Basic Tee
Better Tee
Best Tee
Polyester and Blends
Depending on the end use, polyester or blended garments can be an ideal alternative to 100% cotton. Many have moisture wicking properties, are lightweight and durable making them a great choice for activewear. The synthetic fibres are also less absorbent which helps them dry out quicker and with stain resistance. The 3 main fabrics used are 100% Polyester, 50/50 (Polyester/Cotton) and Tri-Blends (Polyester/Cotton/Rayon) mix.
Although they are soft, long-lasting and great for certain activities. These fabrics are slightly more challenging to print than 100% cotton T-shirts. Because of the way synthetic fabrics are dyed, it can sometimes cause issues during printing. Dark fabrics are especially prone to something called dye-migration if the correct inks are not used. This is just something to be aware of when designing your artwork or planning your range. An extra screen setup and/or print layer may be required depending on the garment used to help combat this issue.
Weight
The weight of the fabric is another important factor to consider. Fabric is measured in grams per square metre (GSM). The higher the GSM, the heavier the fabric. Heavier fabrics can offer better durability, but weight will depend a lot on the customers needs and budget. For screen printing, it’s recommended to use a T-shirt with a weight between 140-200gsm although T-shirts made using heavier fabrics are available in the UK.
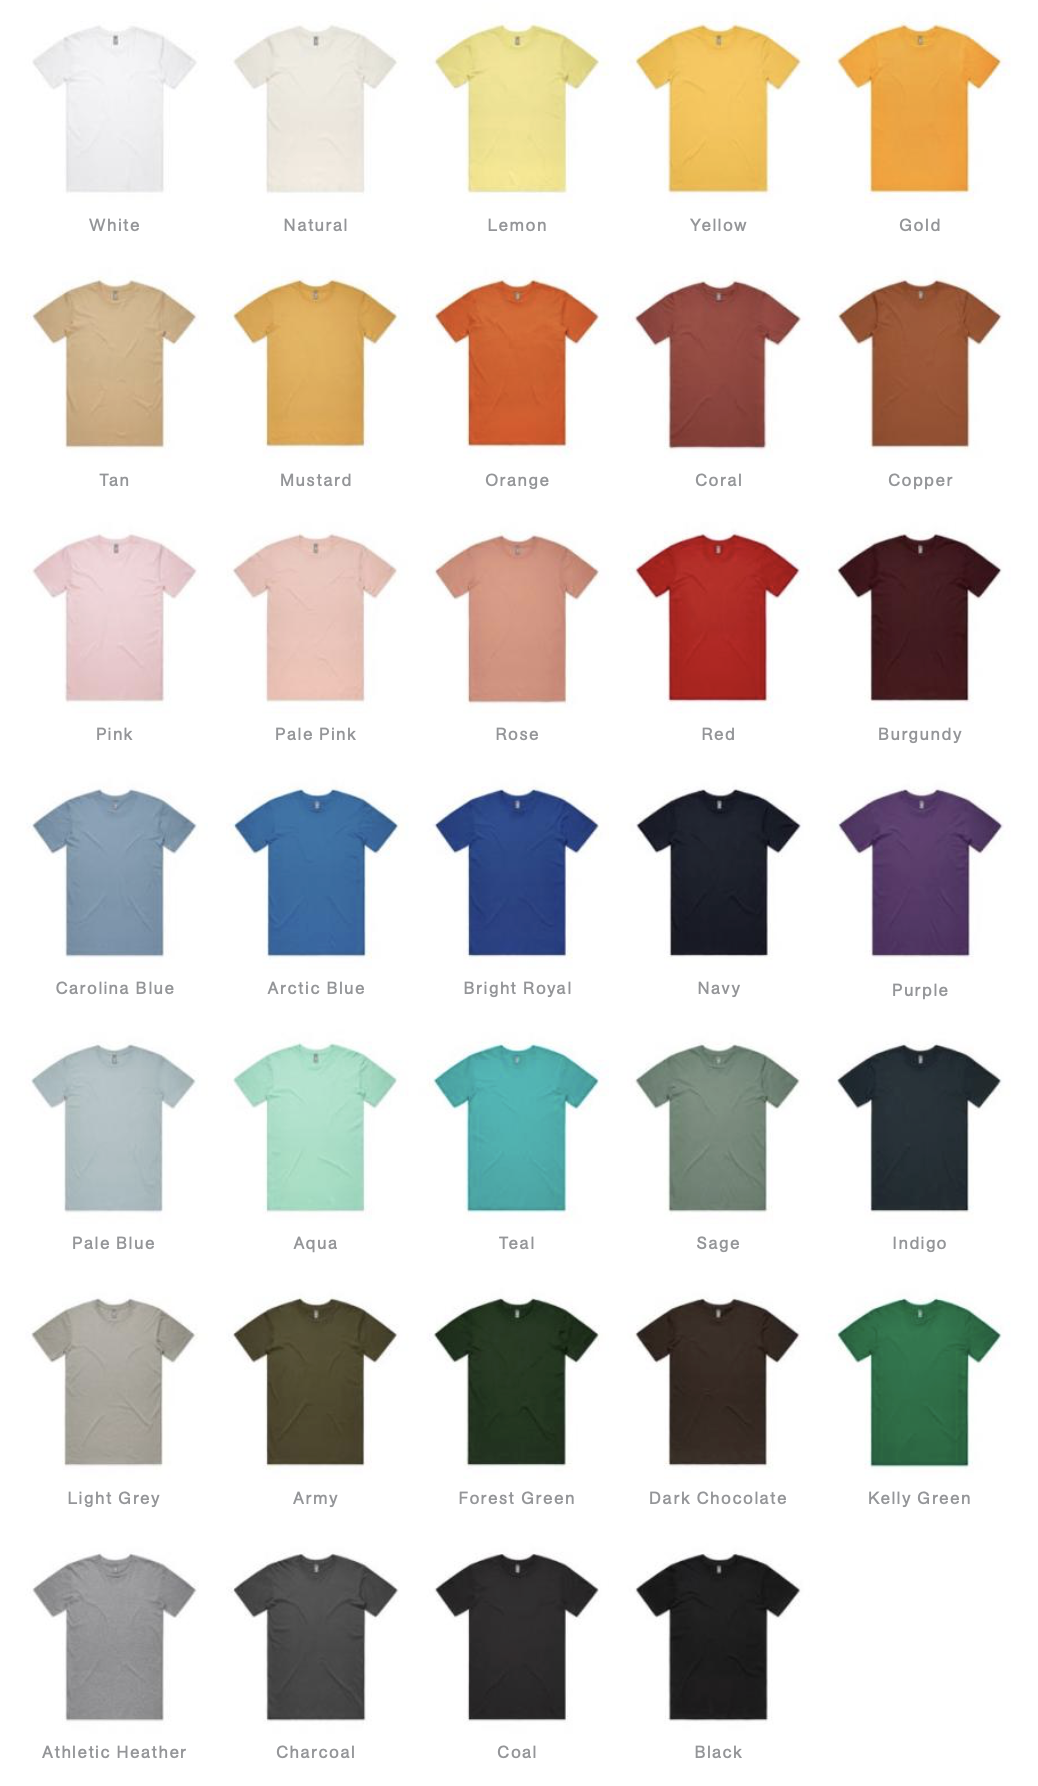
Colour
The colour of the T-shirt is also an important consideration. There are literally hundreds, even thousands of blank T-shirt colours to choose from. Choosing the right colours for your brand is very important and if you get it wrong it could send out confusing messages to your customers.
Darker colours, such as black, navy, grey or red are still the most popular. Darker colours often require extra steps in the printing process than lighter colours. However, if you want to print on darker T-shirts, we can use a white underbase to help the colours of the design stand out or a discharge ink (soft print), depending on the print style you want. Dark T-shirts printed with an underbase give the brightest print finish as the top colours are not printed directly onto the fabric, but printed onto a base (usually white). If you do want to print directly onto dark fabric for a softer finish then discharge ink is the best option. It works best with 100% cotton garments and does not work with all T-shirt colours.
Lighter colours can offer better contrast for certain designs. White or pastel colours do not often require an underbase which means the print is softer. Some designs can even utilise the negative space to add extra dimension to the design. Heather colours are also something to consider. Using this type of T-shirt is a great way to produce vintage or more subtle style prints.
Fit and Style
The fit and style, or the shape of the T-shirt are also important details to look at. There are lots of T-shirts, including classic, fitted, relaxed or oversized to name a few. The fit of the T-shirt can affect how the design looks and how comfortable the shirt feels. It’s important to choose the right style, that’s comfortable and suits your brand or your needs. For example, you wouldn’t want to choose a slim fitting Tri-blend T-shirt if your brand is aimed at skateboarders.
Most blank brands offer an easy to read sizing chart for the garments they offer. Each brand is slightly different from the next and unfortunately there is no ‘real standardisation’ for clothing sizes. If you are unsure of anything, it’s best to get in touch and ask for some advise. We can guide you through the process to make sure you get the right garment for your project.
Brand and Quality
The brand and quality of the T-shirt are another important consideration. You will want to choose an established brand that offers high-quality fabrics and construction. The quality of the fabric can affect the durability of the print, how much the T-shirt shrinks, or loses shape as well as the overall look of the shirt.
As with most things in life, you get what you pay for. That being said, we have a handful of suppliers that we trust and have been working with for a number of years, giving us the ability to provide great quality garments at a reasonable price. We’re more than happy to recommend a certain T-shirt for promotional or higher end custom branded orders. You may wish to do some personal research. A good place to start would be the top 3 brands we offer: Stanley/Stella, Continental Clothing and AS Colour.
In conclusion, choosing the perfect T-shirt for screen printing is essential for achieving great results. When selecting a T-shirt, consider the fabric, weight, colour, fit and style, brand and quality. By taking these factors into consideration, you can ensure that you get the perfect T-shirt for your screen printing project. Our t-shirt printing company can help you! Feel free to get in touch and let us know!
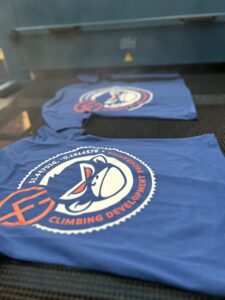
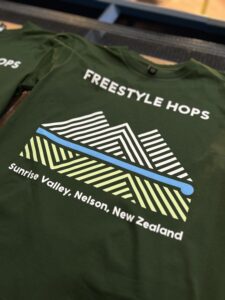
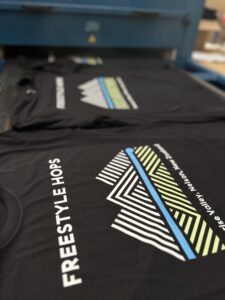
Screen Printed and Embroidered T-Shirts For Your Brewery
Screen Printed and Embroidered T-Shirts For Your Brewery
Printed and embroidered T-shirts, tote bags and other clothing can be a great way to advertise your brewery or launch a new product. Printed merchandise can be a great add-on or alternative to your current marketing strategy. A lot of breweries focus only on Internet marketing, TV, newspaper and magazine adverts or billboards. As effective as they may be, these traditional mediums for advertising and marketing can be very expensive. This is where custom and contract screen printing comes into play.
With the right design, garment choice and print partner, the benefits can be huge! Breweries can design original, eye-catching fashion items that employees, customers and fans will wear over and over again. They are basically ‘walking billboards’ at a fraction of the price of a static version. But in truth, they’re much more than that. They’re powerful marketing tools that customers will actually purchase from you. Just think about that for a minute. You can brand and sell these items, make some extra income and advertise your brewery or products over and over again for free!
We’re not talking about paid influencers here. Potential customers are well aware of that type of promotion and although it can still be worthwhile, there is no more effective endorsement than an actual customer wearing your brand for everyone to see. Those within the craft beer community are always keen to share their knowledge and enthusiasm of a brewery or beer they’ve discovered.
What are the benefits of using printed T-shirts in your marketing campaign?
- Custom printed T-shirts are a brand Identity
- Establish strong brand recognition for your business
- Brand ambassadors and customers are proud to wear them
- Printed brewery clothing can start conversations
- A more relaxed branded uniform for employees and faces of your company
- Quality t-shirts can last for years, continuously promoting your business
- T-shirts are inexpensive and you can even profit from them
Screen Printing is arguably the best method to decorate T-shirts but other techniques are also becoming more popular, including embroidery. Embroidered polo shirts, sweatshirts and hats can add a bit of ‘value’ to your merchandise. If you want a really unique product then why not combine embroidery and print? As well as garments, screen printed tote bags are a great way to promote your business in another way. A good quality tote bag will be used time and time again.
Sponsoring events can be a another fantastic opportunity to promote your brand. Why not talk to the event organisers, ask for permission to print custom T-shirts and/or tote bags that include the event branding alongside your brewery logo, slogan etc.? Event attendees often like to keep souvenirs, especially if they’re free.
Promotion without compromise.
Modern consumers want to know more about what they’re buying, what products are made of and how they were manufactured. Organic cotton is not only more sustainable but the quality is higher than many other off-the-shelf blanks. We offer a great range of organic blanks but there are two suppliers that stand out. Stanley/Stella and Continental Clothing. Both have excellent commitment to corporate responsibility, exceptional labour policies and sustainable practices.
They even supply promotional quality T-shirts at a slightly cheaper price point, made from organic cotton but still very affordable so you don’t have to compromise on sustainability. Cheap standard promo T-shirts don’t fit well and even lose shape or shrink after going through the wash a few times. You want a T-shirt that your customers feel comfortable in, looks good and they will wear many, many times over.
There’s a strong trend with customers swapping to better quality, ethically sourced, organic cotton garments. Cheaper, promotional garments used to be the only type available and once the industry standard. But times have changed and so have consumers.
Custom printed T-shirts are an easy way to promote your brewery. By turning creative ideas into t-shirts for your brand, you will find that there are plenty of good marketing opportunities out there and they are cost-friendly, easy and can also be fun!
What Is Screen Printing? A Step-By-Step Guide (With Pictures)
What Is Screen Printing? A Step-By-Step Guide (With Pictures)
Screen printing is one of the oldest and most popular methods for transferring images onto garments. It has been used to produce everything from t-shirts, hoodies, bags and hats, to posters, prints and other wall art. After running a screen printing company for over a decade, we like to think we know a thing or two about it. In this blog we will discuss what screen printing is, different types of styles, step by step guide on how to do it yourself, what equipment you need, as well as a brief history of how it all came about. So let’s get started!
What is Screen Printing?
In basic terms, screen printing is the process of transferring ink onto a substrate through a woven mesh and/or stencil using a squeegee. Although fabric and paper are the most frequently printed surfaces, this technique can also be used to print a wide range of materials including metals, plastics, wood and glass. Here at Flood we mainly print fabrics.
Screen printing is still the most widely used technique for printing garments because of the wide range of vibrant colours available and ease of printing large quantities even on dark fabrics. Special effects inks and techniques can also be utilised to produce some really eye catching finishes.
Although each colour within a design generally needs a separate screen, there are some methods of reproducing very colourful artwork reproductions with a limited number of screens.
Expert graphics separation techniques, (paired with the right meshes, inks and a skilled printer) can produce amazing results.
Screen Printing Styles
The main styles or processes of screen printing on garments include:
Spot Colour Screen Printing: usually blocks of colour used to print vector artwork without too much detail.
Halftone Printing: small dots of varying sizes simulating a gradient or shading in the artwork.
Grayscale Printing: uses halftones in one or more shades of grey to produce detailed black and white images.
Duotone Printing: similar to sepia photography prints, this method uses a black ink plus another colour to produce tonal artist style prints.
CMYK (4 Colour Process Printing): Cyan, Magenta, Yellow and Black are used to produce a full colour image. Mostly used on white or very light garments.
Simulated Process Printing: can be used on light or dark garments and usually includes anything from 3 to 14+ colours. This is a very versatile and accurate method used in the reproduction of photorealistic designs and artwork with lots of detail/colours.
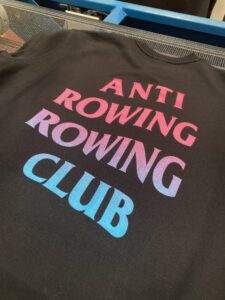
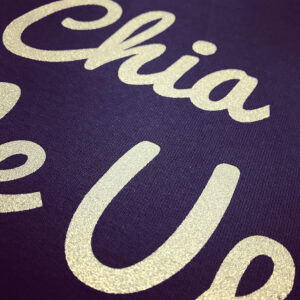
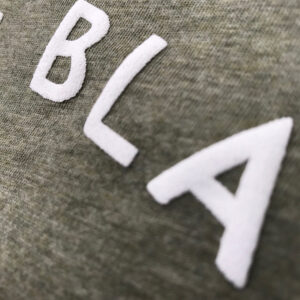
Special Effects: can be used to produce high build, puff, glitter, metallic and gloss designs to name a few.
Step-By-Step guide to Screen Printing
Step 1: Artwork/Logo/Design
All great screen prints (or any print for that matter) start with great artwork. The design itself is not necessarily important but the quality of the digital image most definitely is. We recommend either a vector file, or a high resolution raster image (300ppi minimum resolution) at finished print size. If the image quality is low then it’s almost certain the final print won’t be as high standard as it should be. There are lots of ways to transfer the image to a screen, but the most popular is to print out positive film and expose the emulsion with UV light. This is how the stencil is created.
It’s worth remembering that each colour within your design requires a screen of it’s own (in most cases). For that reason, you may want to think about this at the design stage, especially if you’re working to a budget or the quantities required are low (20-50pcs). Once you’ve sent your design to us, we can look over it and either provide a quote or recommend an alternative print method (DTG or DTF) if we think it’s more suitable.
If your design is a single colour print then things are relatively simple. If your design has multiple colours then it will need to be separated by us in a graphics program and then ‘put back together’ on press.

Step 2: Choosing, Preparing and Coating Screens with Emulsion
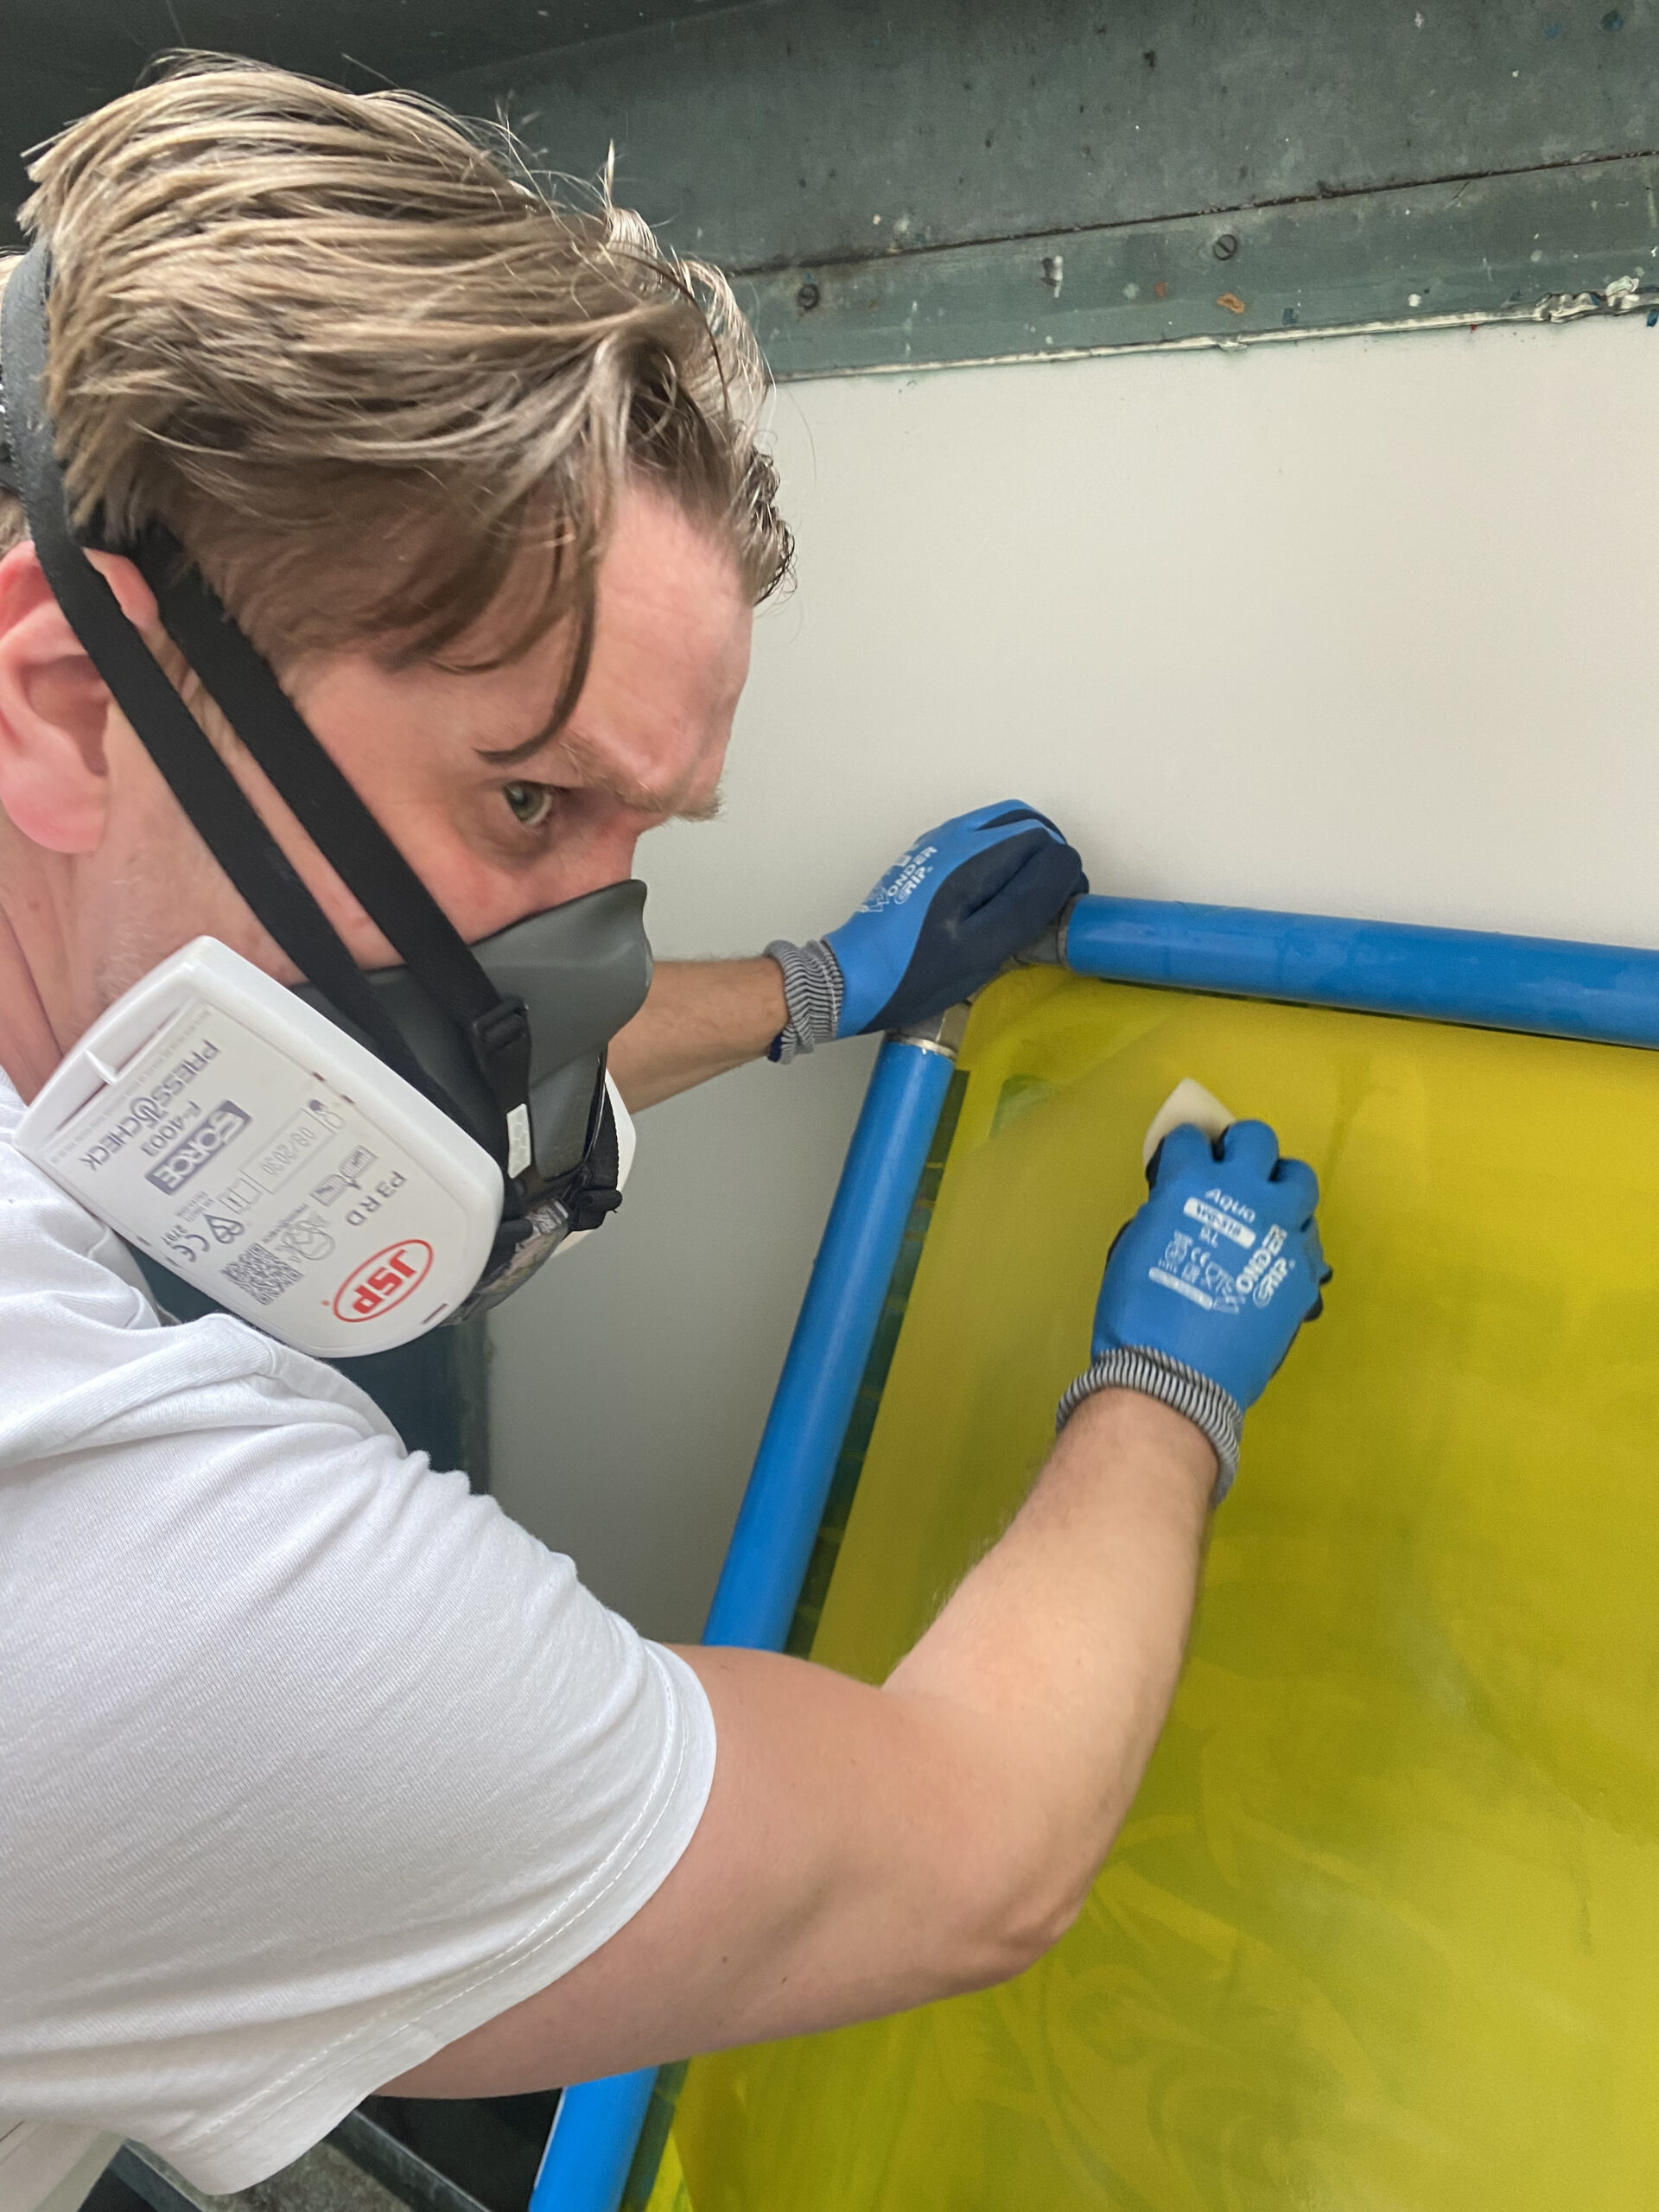
In order to transfer your design to garments or bags, we have to use a screen, or a number of screens to produce stencils. Once we know that each colour in the design requires a separate screen, it’s time to choose the correct mesh. This will depend on the type of ink being used, the garment being printed and the amount of detail within the design. Meshes range from coarse (thick inks) to very fine (thinner inks and fine detail).
Each screen has to go through the same process each and every time to prepare it for emulsion coating. It’s extremely important that any old ink and emulsion is removed from previous print runs and that the mesh is degreased and rinsed before drying in a warm, dust free environment. Only when the mesh is completely dry is it ready to apply the photosensitive emulsion.
Emulsion is applied by hand (manually) or with the use of an auto-coater. The number of coats depends on a few variables. These are mainly the mesh coarseness, the ink being used (desired thickness) and again, the detail in the artwork. Once emulsion is applied, the screens are dried again for approximately 30-40 minutes at around 40 degrees C.
Step 3: Exposing the Screen/Creating a Stencil
There are many ways to expose an image onto the screen, however likely the most popular and widely used is the use of positive film. The film is printed using an inkjet printer or image setter. A film is aligned on each of the emulsion-coated screens and they are exposed using bright UV lights. The light hardens the emulsion where there is no image and stays soft under the positive image where it has not been exposed. The image can then be washed out, creating the stencil before the screen is dried again and is finally ready to use on the press.
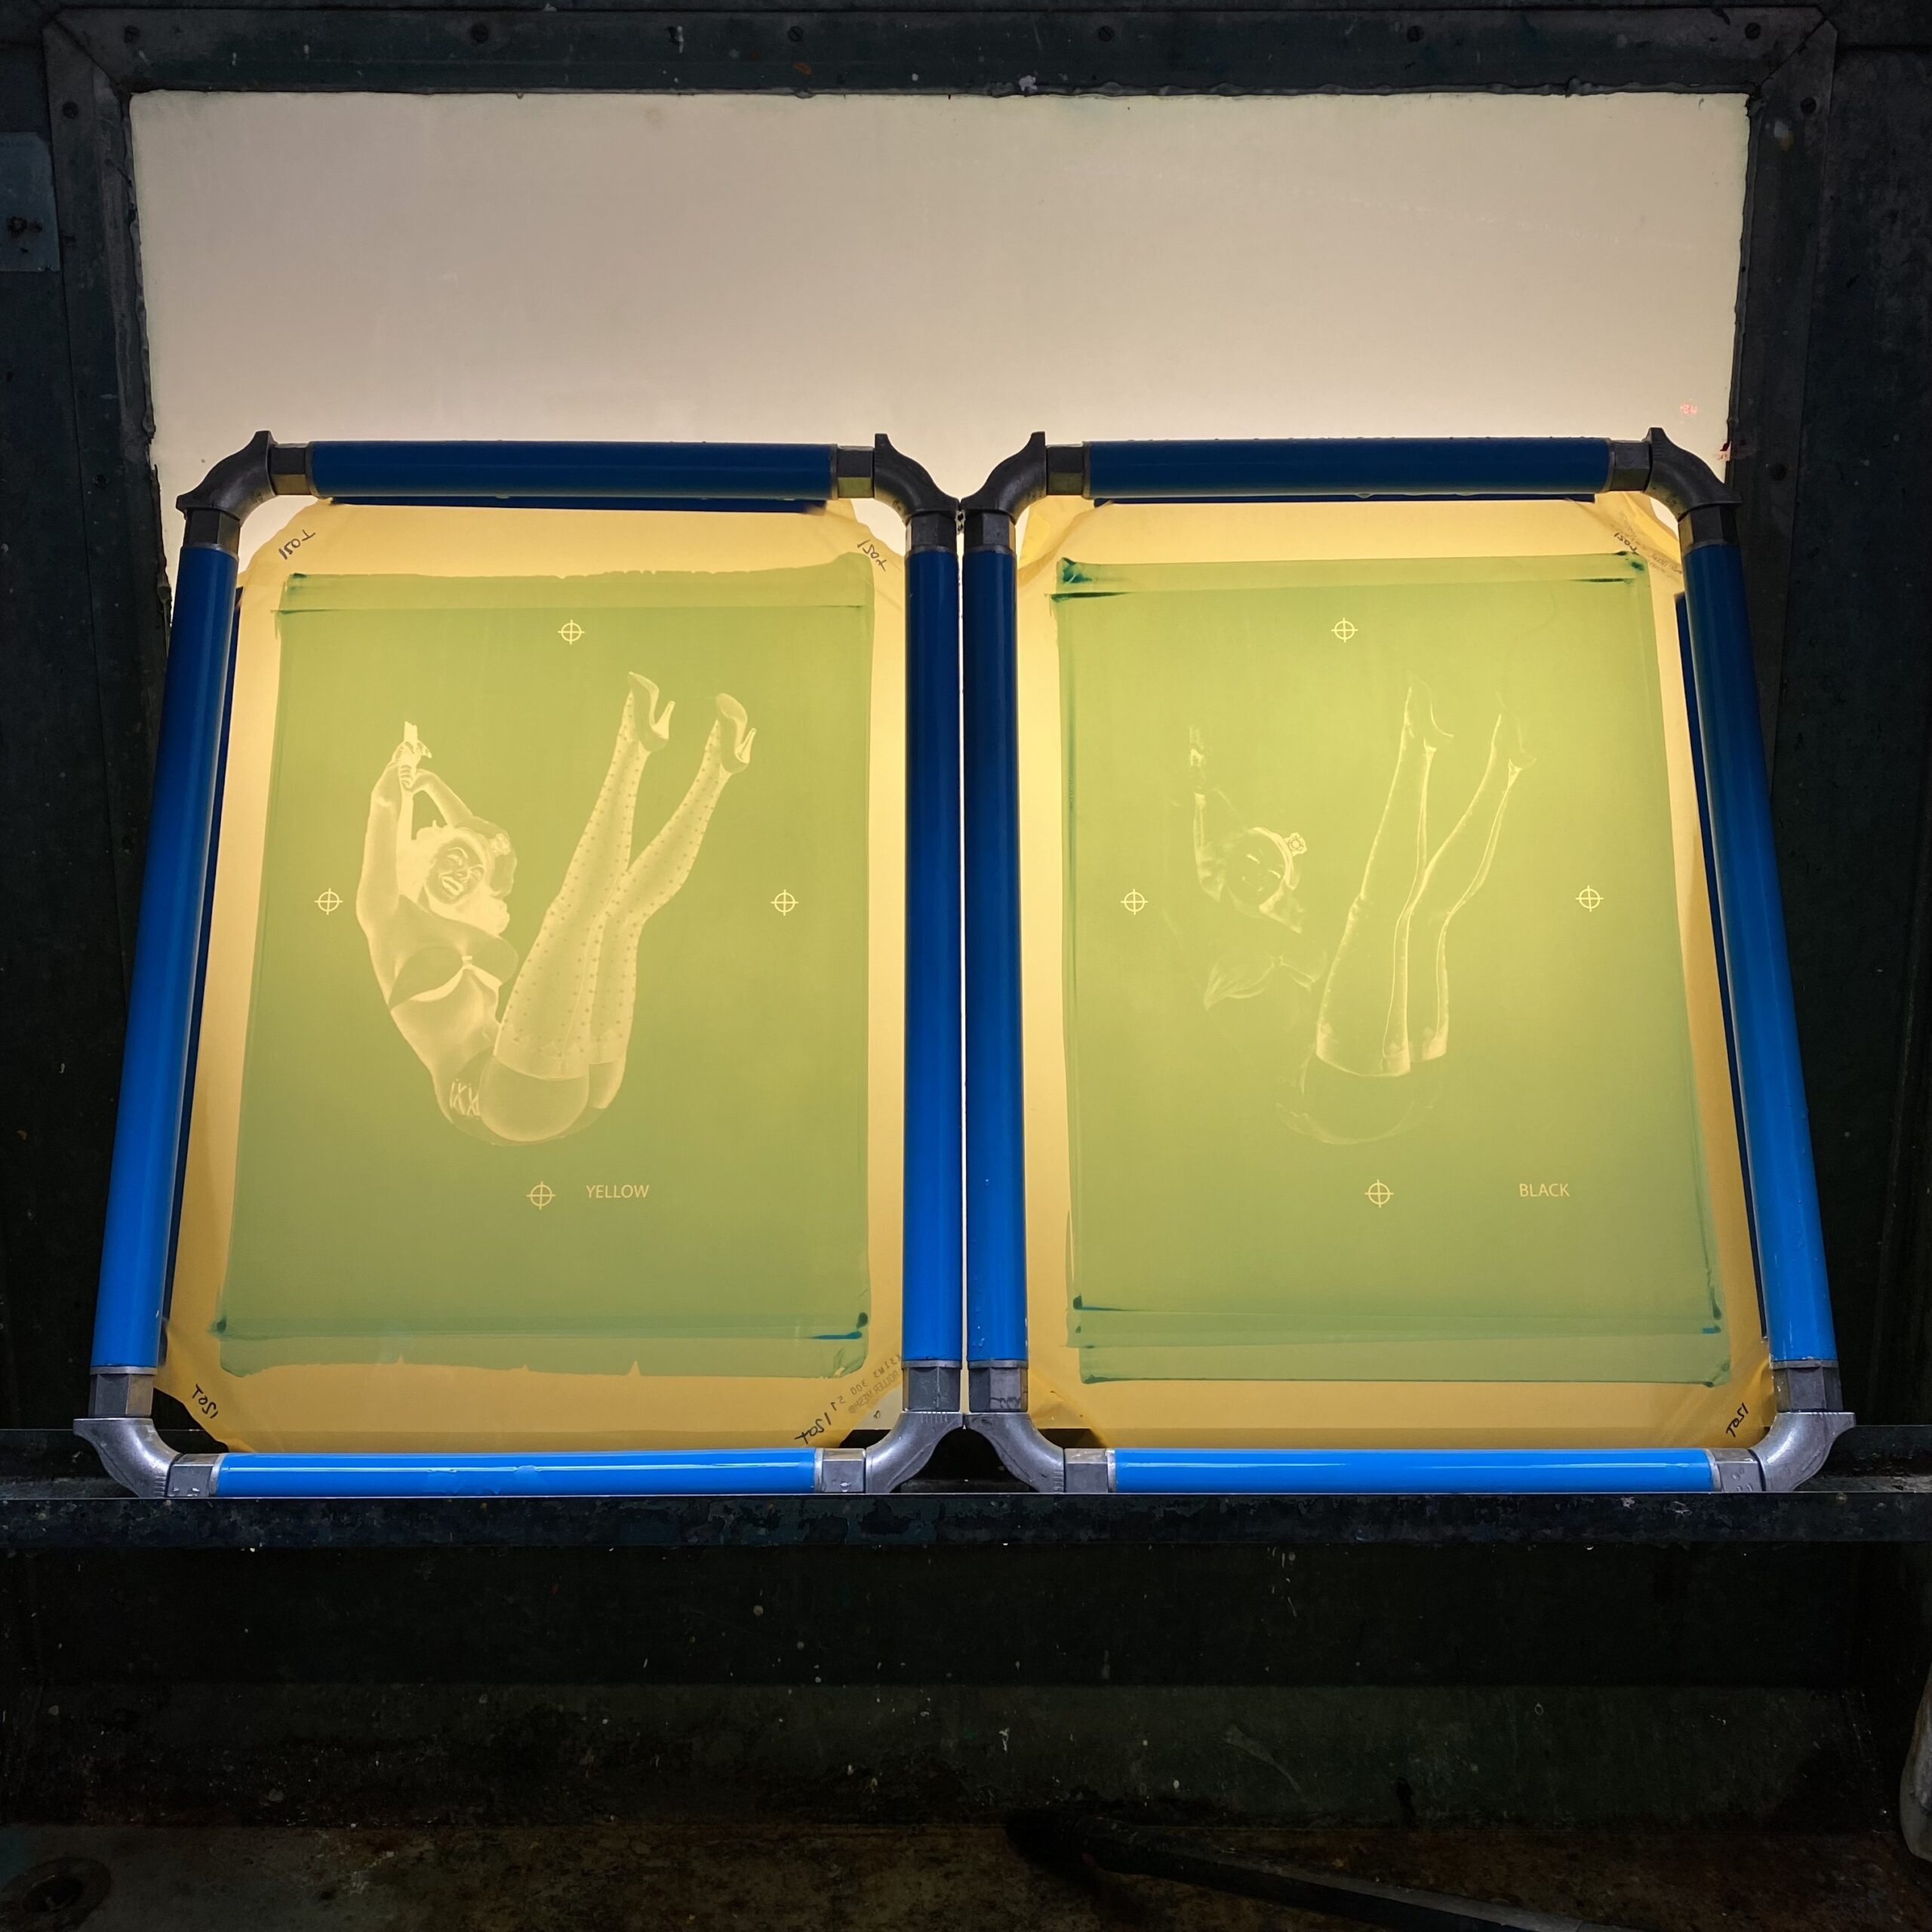
Step 4: Screen Registration
If your design is a single colour print on a light garment or bag then the screen is taped up and placed on the press in the correct position. If your design has more than one colour then each screen has to be registered on the press so the colours are printed exactly as the original artwork. Ink colours are selected and test prints are made before full production begins.
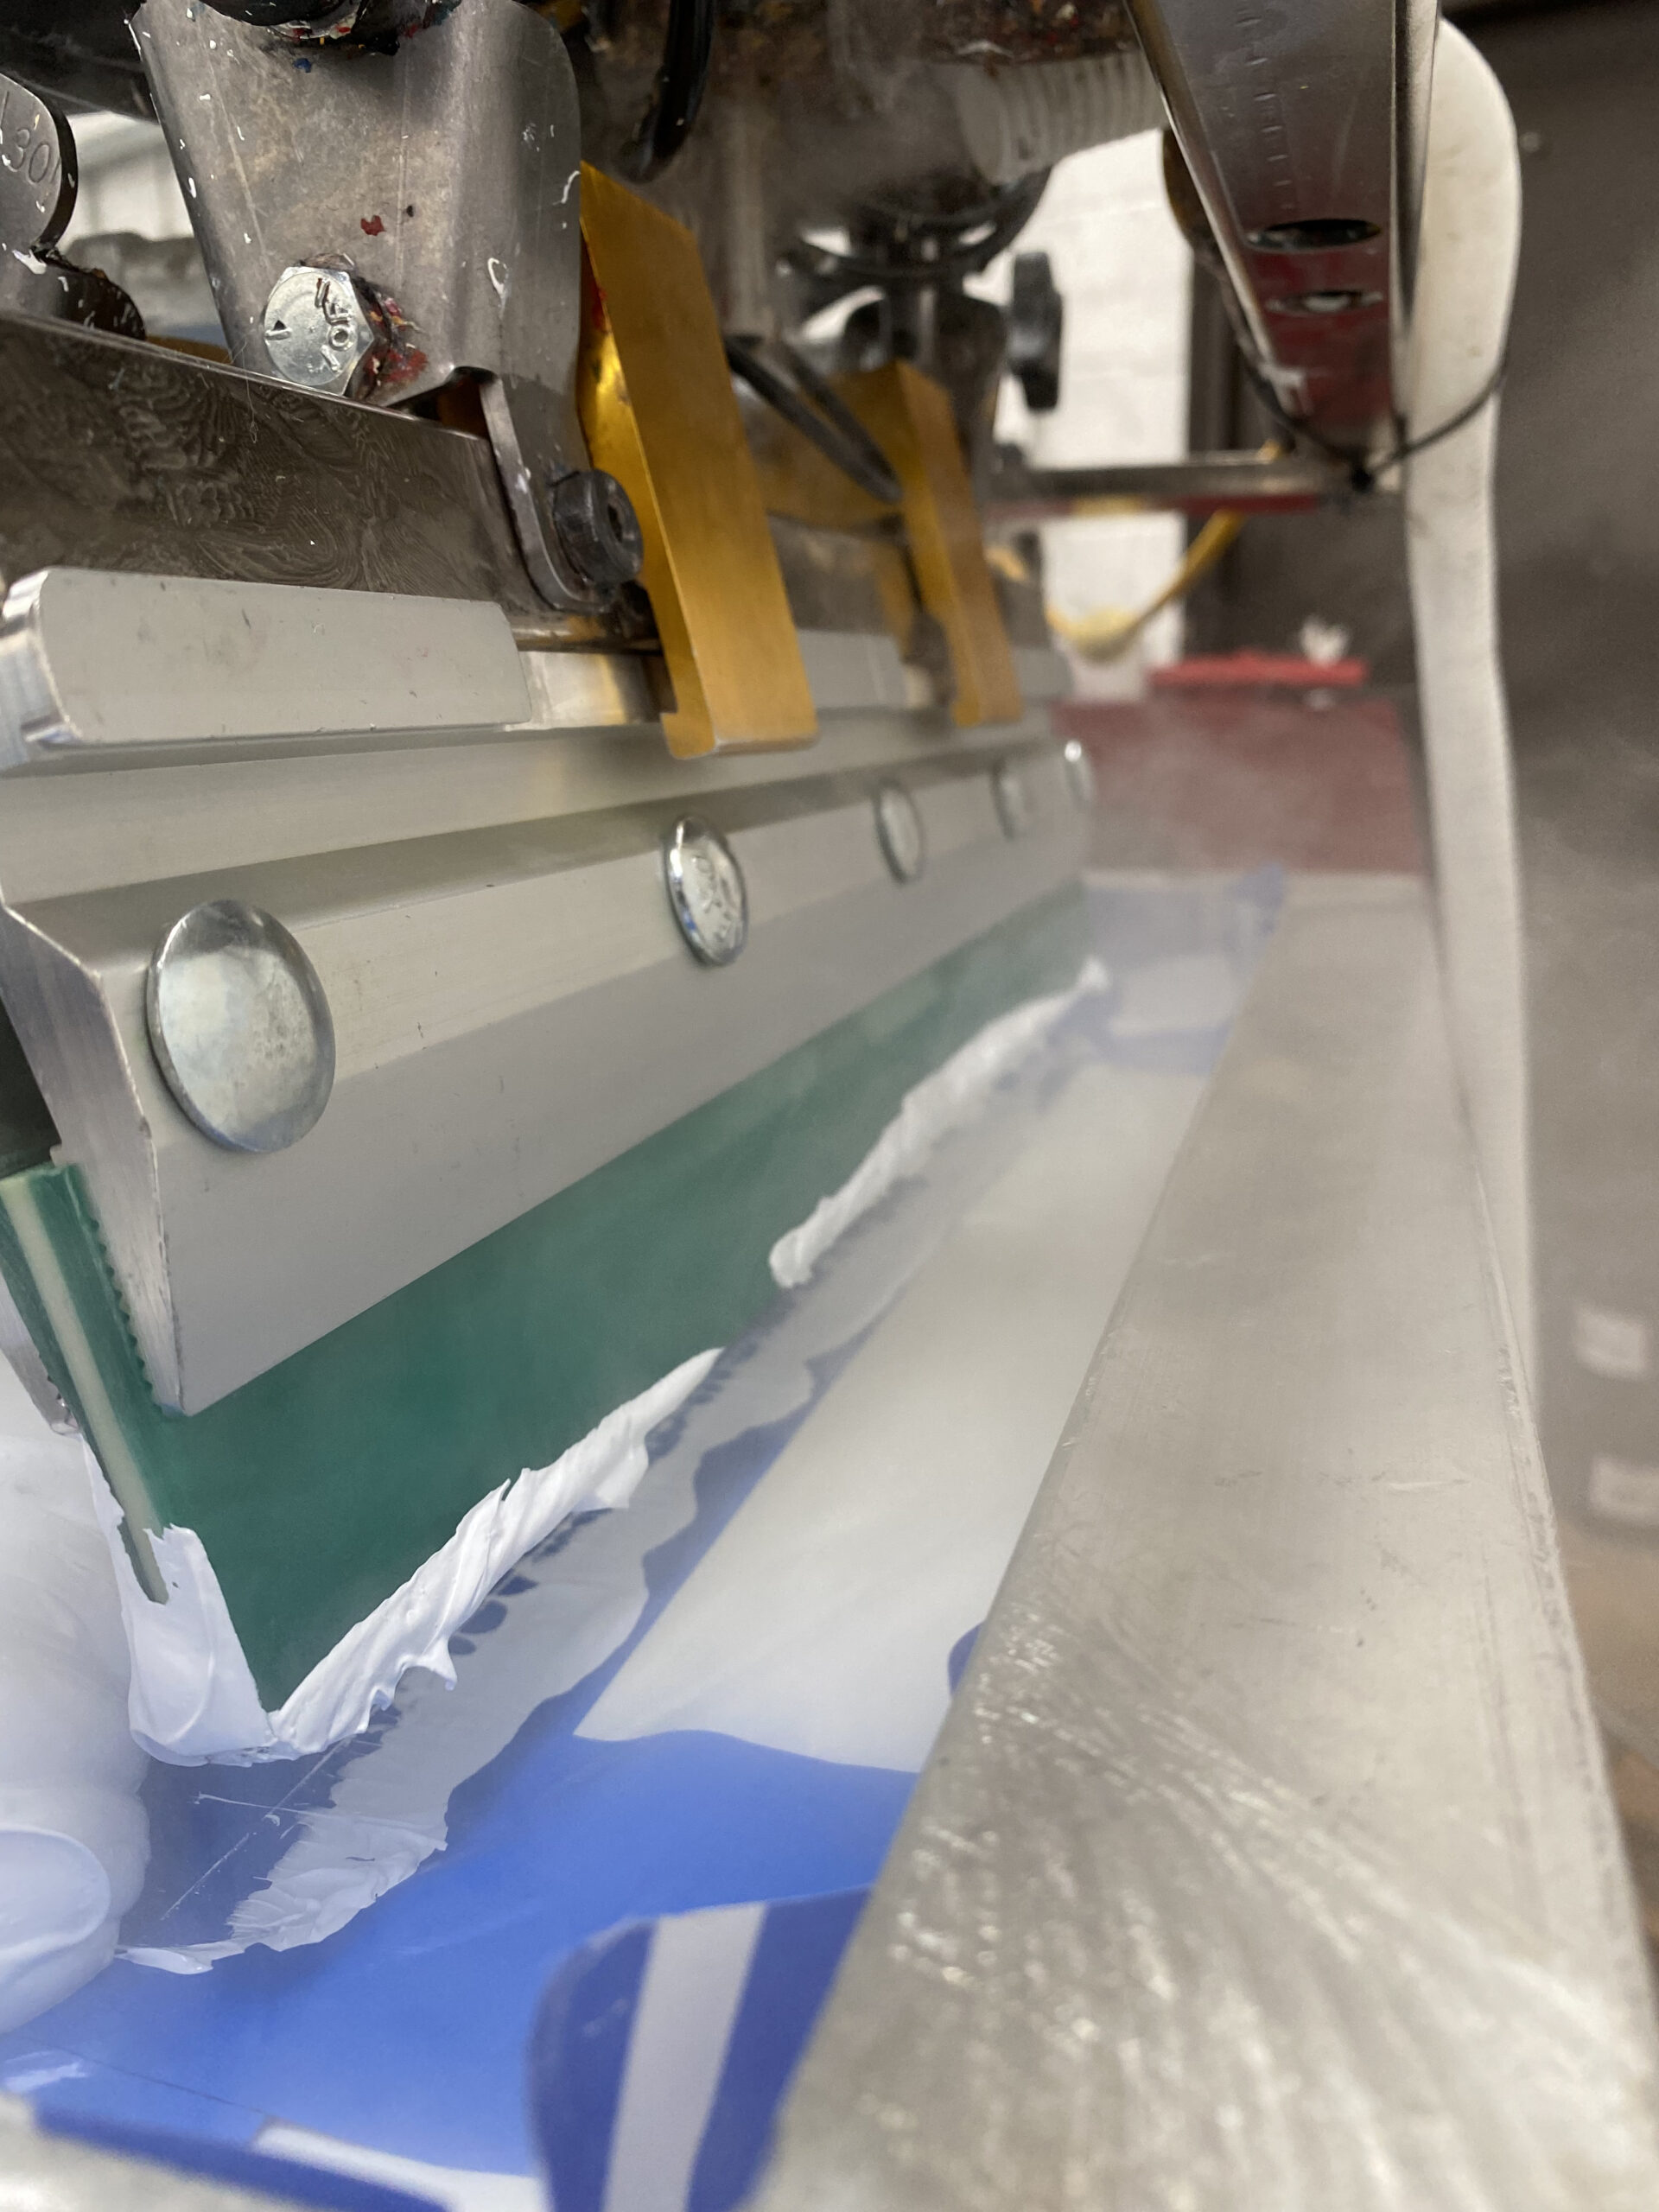
Step 5: Printing
Using a manual or automatic press, garments being printed have to be flat, so each one is laid down on the lightly tacked press platens or boards. One type of press is not necessarily better than another, but for speed and repetition, an automatic press will be used to print large orders. An auto-press takes out nearly all human error and is capable of printing multi-coloured designs quickly. Each pre-registered screen is lowered to the garment and ink is pushed through the open areas of the stencil from the top side using a squeegee. The design comes to life on the garment!
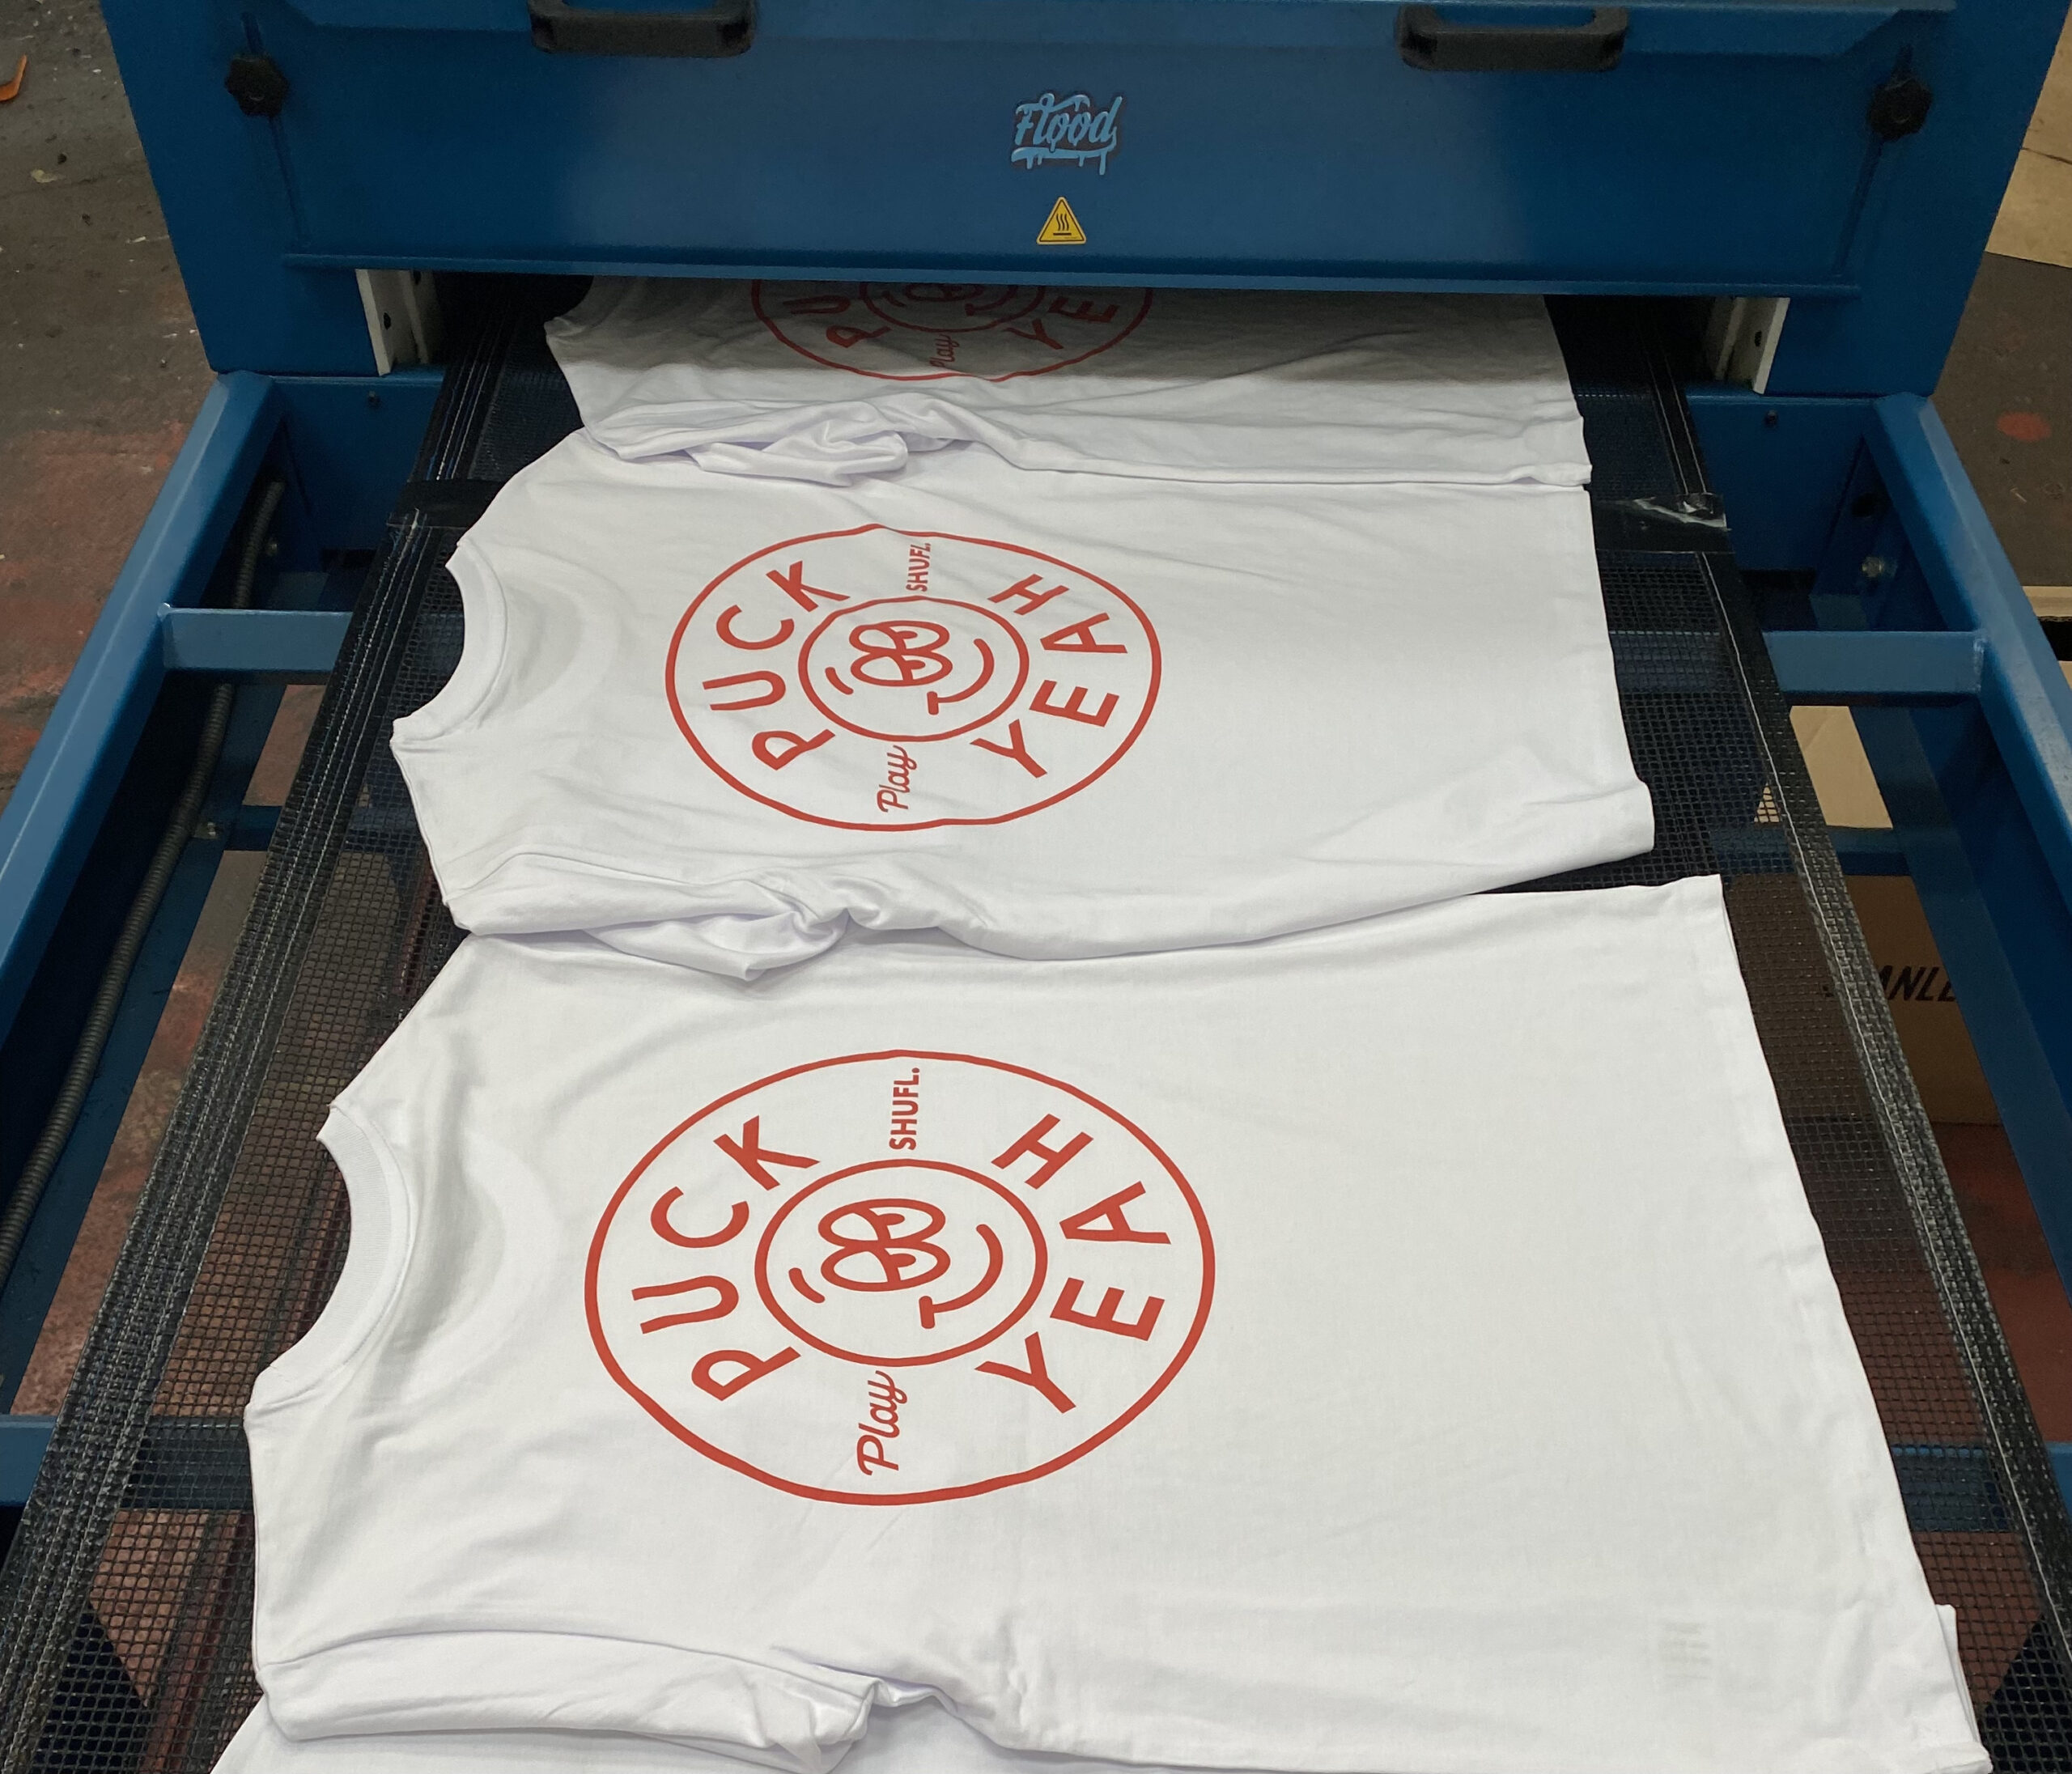
Step 6: Drying or Curing
In order to make sure your design lasts the test of time, it’s essential the ink is cured or dried. Whether your design is printed using water-based, discharge or plastisol inks, the basic process is the same. The freshly printed garment is sent through a large industrial dryer to ensure a bright, smooth and durable print.
Screen Printing Equipment
As mentioned previously, screen-printed graphics can be applied to all sorts of substrates. We’re concentrating on garment decoration so we will focus on equipment used for printing T-shirts, sweatshirts, hoodies, bags and everything in between.
With a bit of time and effort, pretty much anyone can print a T-shirt. All they need is a few basic pieces of equipment and space to print in. On a very small scale or just a DIY setup, you’ll need the following; A screen, a squeegee, ink and some blank T-shirts. A stencil can be made by cutting a piece of film, or if you have the tools to do it, exposing a screen with emulsion. There are even inks that air dry if you don’t have the equipment to cure the print.
As the production quantities get higher and the artwork gets more complex, so does the quality of the equipment and machinery used. A well maintained manual carousel, paired with a skilled operator can produce some very high quality work but for precision and speed an automatic screen printing press is a must. Two people using a manual press, printing one colour will output around 100-150 prints per hour. Whereas multi-coloured prints on an automatic press can be produced at up to 1,000 pcs per hour.
Washout Booth: Large wet area for degreasing and reclaiming screens
Silk Screens: High tensioned mesh stretched over a wooden or metal frame
Scoop Coater: Tool to apply emulsion to meshed screens
Emulsion: Photosensitive chemical applied to screens to create a stencil
Exposure Unit: UV, Metal Halide or LED light for exposure
Film Positives: Clear film printed with a light blocking black in
Inks: Plastisol, Discharge, Water based and Special Fx
Screen Printing Press/Carousel: 6 – 14 colours – Can be manual, semi-automatic or automatic
Squeegee: Rubber blade clamped into metal or wooden holder
Flash Dryer: Used to dry an underbase or in between colours on press
Conveyor or Tunnel Dryer: Electric or Gas dryer used to cure printed screen inks
A Brief History of Screen Printing:
Screen Printing is said to have originated in China over 1,000 years ago and although the equipment has improved significantly, the fundamentals are still the same. During the Song Dynasty it was a popular way of transferring patterns onto fabrics. Close neighbours in Japan also started using simple stencil techniques to print basic images onto fabric. Stencils were sometimes cut from paper or cloth and the mesh screens were made using human or animal hair. Natural pigment dyes (inks) were then pushed through the stencil with a stiff brush to produce an image.
It wasn’t until the late 17th, early 18th Century that the techniques became popular in Europe. The French began weaving silk to produce screens but still used brushes to push the ink through the mesh onto fabric. This eventually evolved into silk being stretched tightly over wooden frames, allowing improvements in the quality of the image being printed.
Skip forward to the early 1900’s, and the first record of squeegees being used to pull ink through the silk screen mesh. This really helped revolutionise screen printing commercially and when Roy Beck, Edward Owens and Charles Peter introduced photosensitive emulsions, the industry took a giant leap towards.
In 1938 a group of artists formed the National Serigraph Society and coined the term Serigraphy (“seri” silk in Latin and “graphein” to draw in Greek) as a way to differentiate their own artistic application of screen printing on to paper from the industrial, commercial use of the process. These techniques inspired the famous pop artists of the 1960’s that we’re all familiar with today. Pop artists such as Peter Blake, Andy Warhol and Roy Lichtenstein used screen printing to reproduce art on a large scale.
At approximately the same time Michael Vasilantone was creating the first screen printing carousel, a multi-colour garment screen printing machine. Since the 60’s popularity in printed T-shirts has grown and grown, and although technology has advanced his patented creation is still the basis of equipment used today.
The modern screen printer has a unique mix of artistic and scientific knowledge. Since the 1980’s, high detailed band shirts and clothing brand artwork has been reproduced as screen prints. With technology continuously improving and the availability of high end computer software, screen printing is here to stay! Although digital printing techniques have been available for a number of years, they have not yet replaced traditional screen printing and for large volume orders, are yet to match up.
Screen printing is a great way to customize clothing and other items with unique designs. With the right equipment, you can create high-quality prints that will last for years. Whether you choose to use manual or automatic presses, it’s important to have quality products such as screens, inks, emulsion, and film positives so your design stands out from the rest. By using these tools properly and following all of the steps outlined above, you’ll be able to produce beautiful screen-printed garments every time!
We also offer a range of other services such as transfer printing, dtg printing and embroidery.
Flood Wholesale t-shirts: UK screen printers stock!
You may or may not know, we don’t manufacture garments in house, we custom ‘decorate’ them with your designs. It’s a common misconception that UK screen printers hold wholesale t-shirts and other garments. I used to think the same. There are 3 main reasons why this doesn’t happen, let me explain.
Number 1: Garment Manufacturers and Suppliers
We use around 4 different suppliers based in the UK and a handful of brand suppliers across Europe. Most of the UK based companies are ‘one-stop shops’ holding literally millions of items in stock. Up to 4,500 different products and over 150+ brands. Many wholesalers out there specialise in buying stock directly from brand manufacturers. These types of companies warehouse and ship stock directly to us within a day or two! They have huge warehouses (1,000’s and 1000’s of square foot) to store them. Without them, we wouldn’t be able supply you with the wide range that we have on offer.
Number 2: Brands, Styles and Colours
Most brands have tons of different styles and colour variations to chose from. The Gildan Softstyle T-shirt alone has 50 odd colours available. The sizes range from XS youth right up to 5XL adult. If you multiply that across the whole range of styles, well it’s a lot of garments!
Number 3: Cost
We usually have a small amount of black and white t-shirts in stock (most popular) but we can’t guess what customers will order next. One day we might be printing heather grey sweatshirts for a running club, the next it might be pink t-shirts for a skate shop, then even pairs of thongs for an artist. By not stocking a large inventory it allows us to keep costs down and order on request.
Does ordering stock slow down the print process?
Not at all. Our standard turnaround times are up to 15 working days from receipt of payment. Most of our suppliers use a next day courier service, which means our customers are rarely affected by delivery times. Occasionally a certain style or colour will not be available. It's rare, but if it does happen we will do our best to find a replacement style that is as good as or an upgrade to the original.
Screen Printing Inks & Different Types of Print Finishes
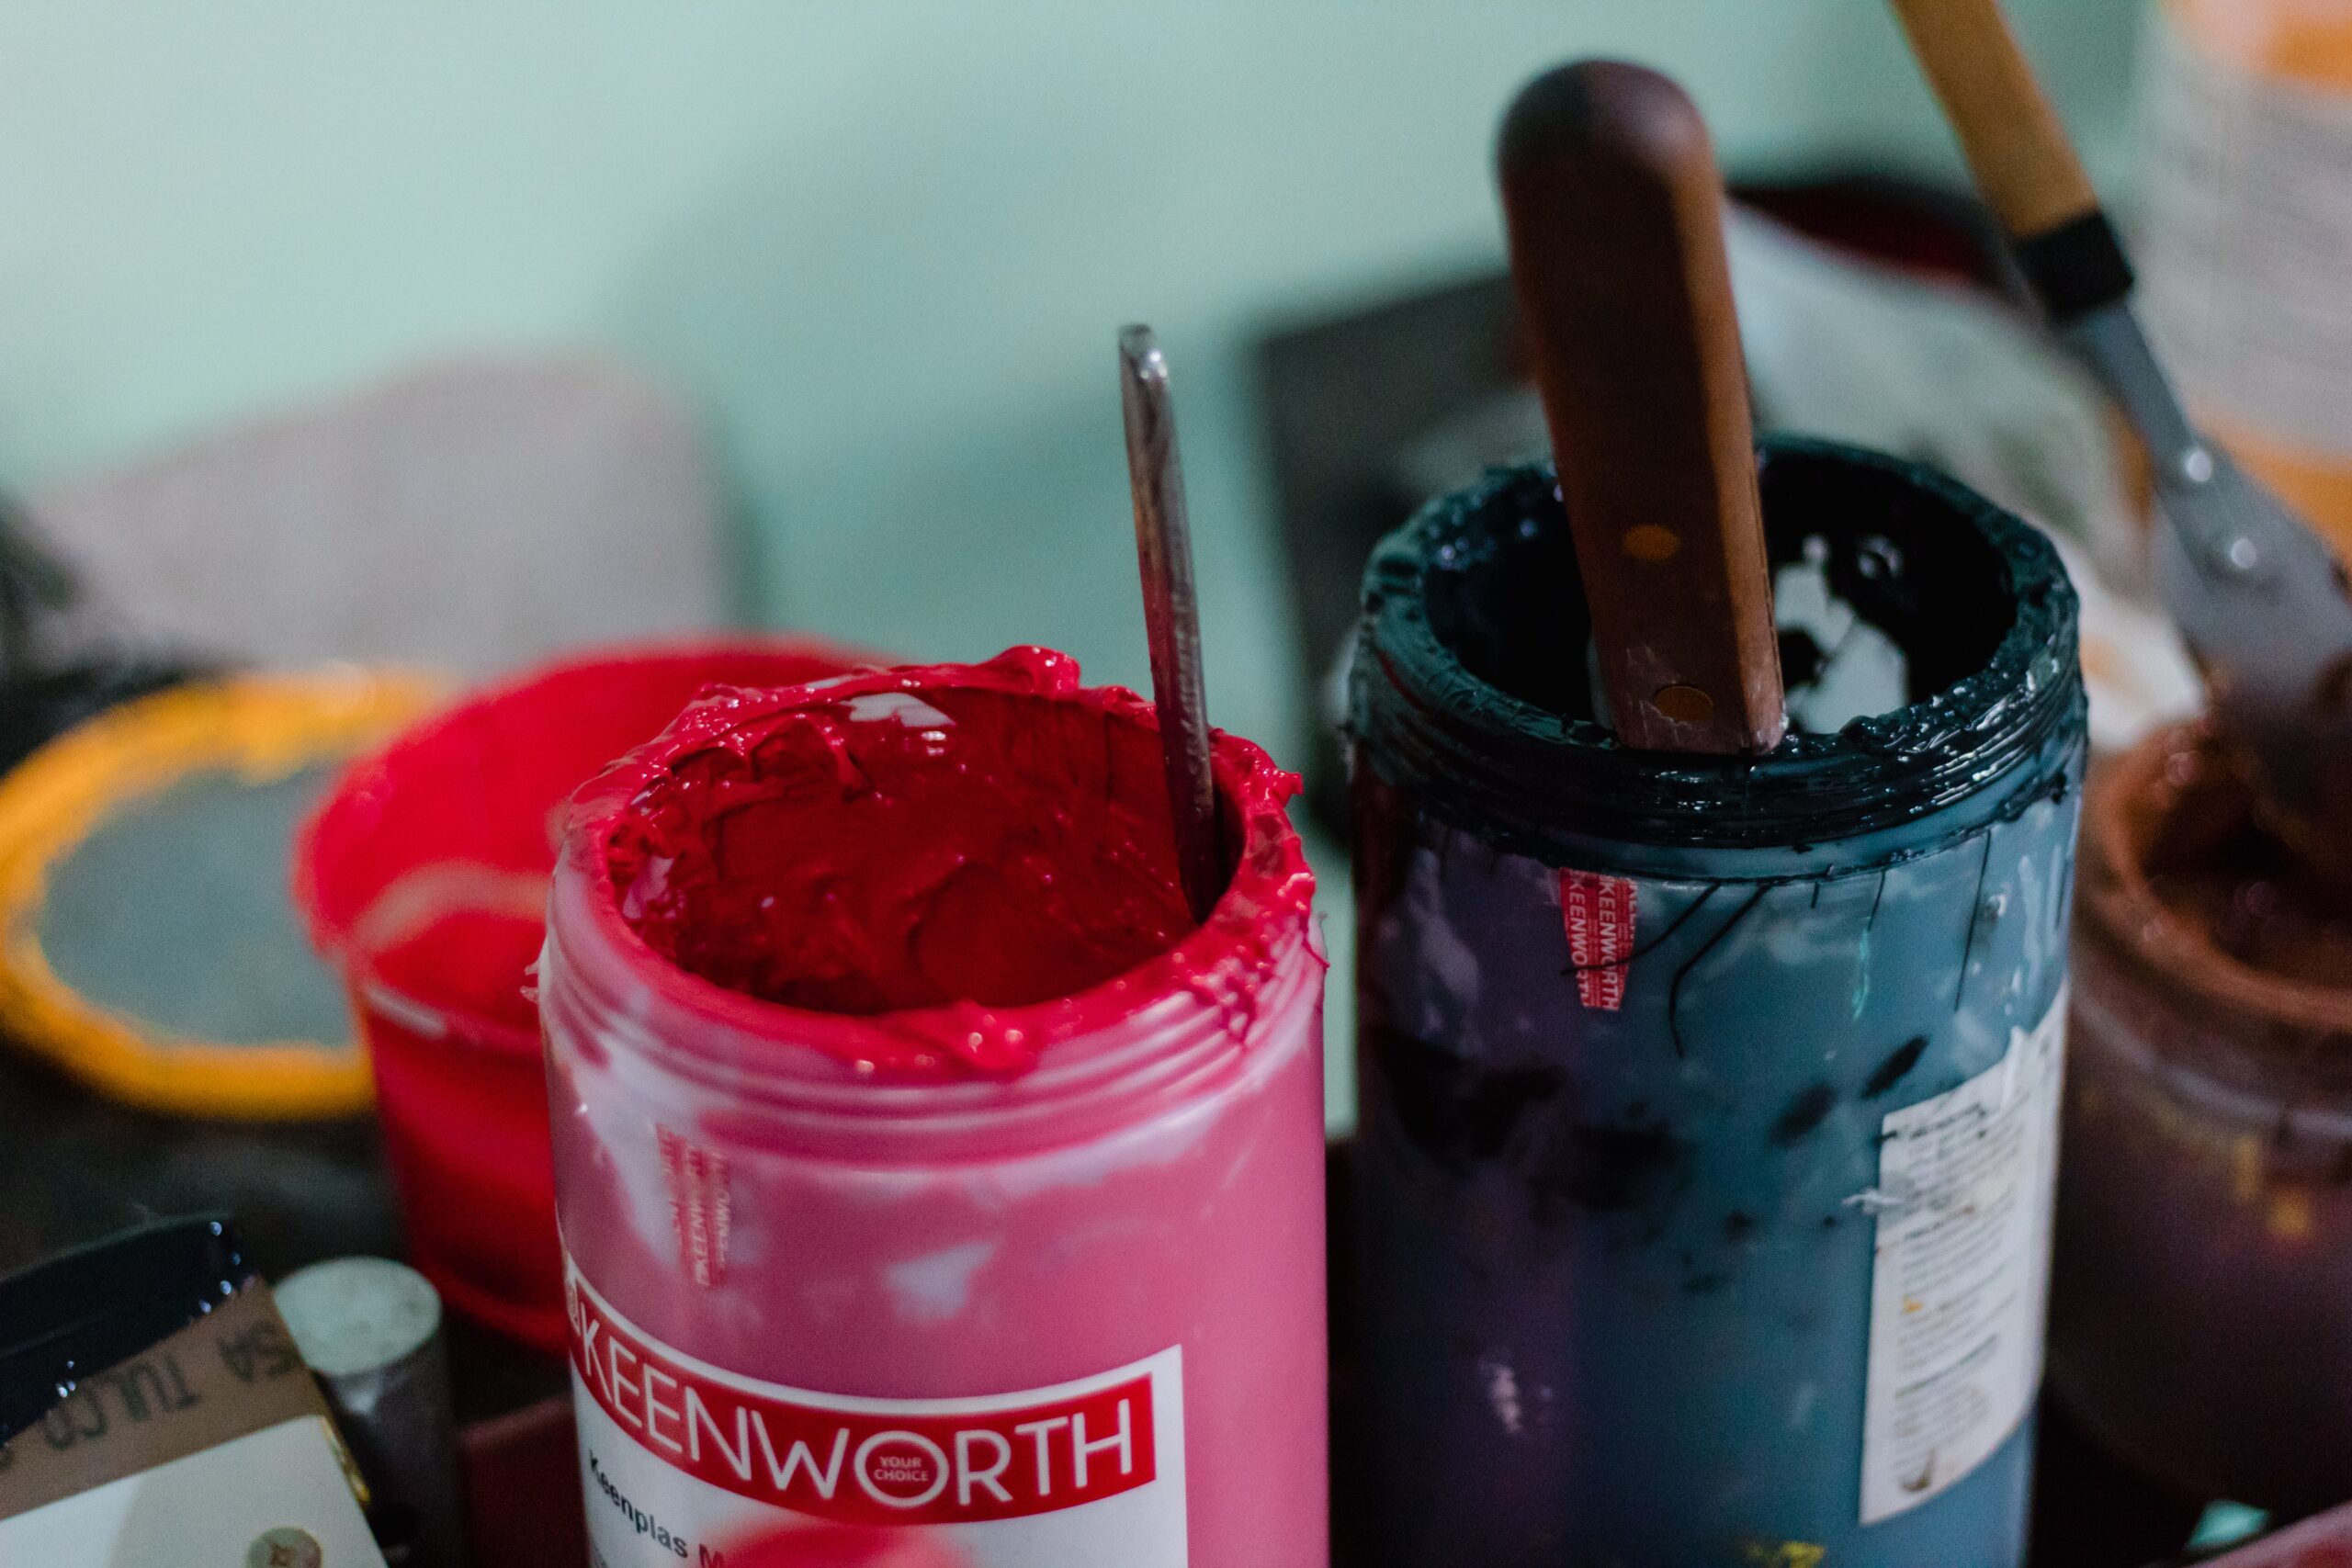
Water-based Ink:
Our preferred ink of choice. Water-based inks produce very soft bright print colours and bright whites with an excellent finish, stretch performance and great wash durability. Our inks are free from harmful, toxic chemicals making them safer for the environment. Water-based inks have moved on a lot and nowadays can be used on every fabric, from cotton to the most challenging high stretch performance poly fabrics.

Plastisol Ink:
The most popular and widely used screen printing ink specifically designed for garment printing. Most types of garments can be printed and we can produce bright finishes on dark garments with the use of an underbase. Not as soft as other inks available but printed plastisol ink will last as long as the T-shirt! However, here at Flood we can use a discharge underbase and our soft plastisol inks over the top. That means it’s now possible to get bright soft prints even on dark garments.
Discharge Ink:
A type of waterbased ink for dark 100% cotton garments. Discharge ink removes the original fabric colour and replaces it with a pigment colour of your choice. This process has a reputation of being horribly toxic. Our Formaldehyde Free Discharge Systems are evironmentally friendly and ready to wear without being pre-washed. They produce very bright colours and ultra bright whites with an excellent soft finish and wash durability. Once washed discharge prints are soft, breathable and totally intergrated with the fabric. Be aware, this type of printing only works with 80-100% reactive dyed cotton garments, with a few exceptions.
Performance Printing:
The problem with some performance wear is the fabric dye can sometimes migrate into plastisol and waterbased inks, changing the colour of them, ruining the garment design. We don’t have that problem, in fact around a lot of the garments we print are made from performance fabric. We use high quality low-bleed & dye blocking inks that are perfect for printing onto garments with high polyester content.

Process Printing:
Certain artwork with a lot of detail or photographic type images require a different type of printing and sometimes ink to get the desired effect. Every design is different so it's best to get in contact with us via email to find out what print technique suits your design. Due to the difficulty involved there is a small setup fee to get your artwork ready for printing.
Special Effects Printing:
In addition to the above inks and processes we use speciality or special effects inks. These include puff, suede, glow in the dark, metallic and many more. Get in touch if you’ve got a design you think needs something extra. We can advise you on the best way to get the right finish to your garments.
Everything To Know About Garment Finishing
Why is it called garment finishings? Because that’s exactly what it is! If you want to make your brand that bit more unique, then why not take advantage of our custom garment finishing service?
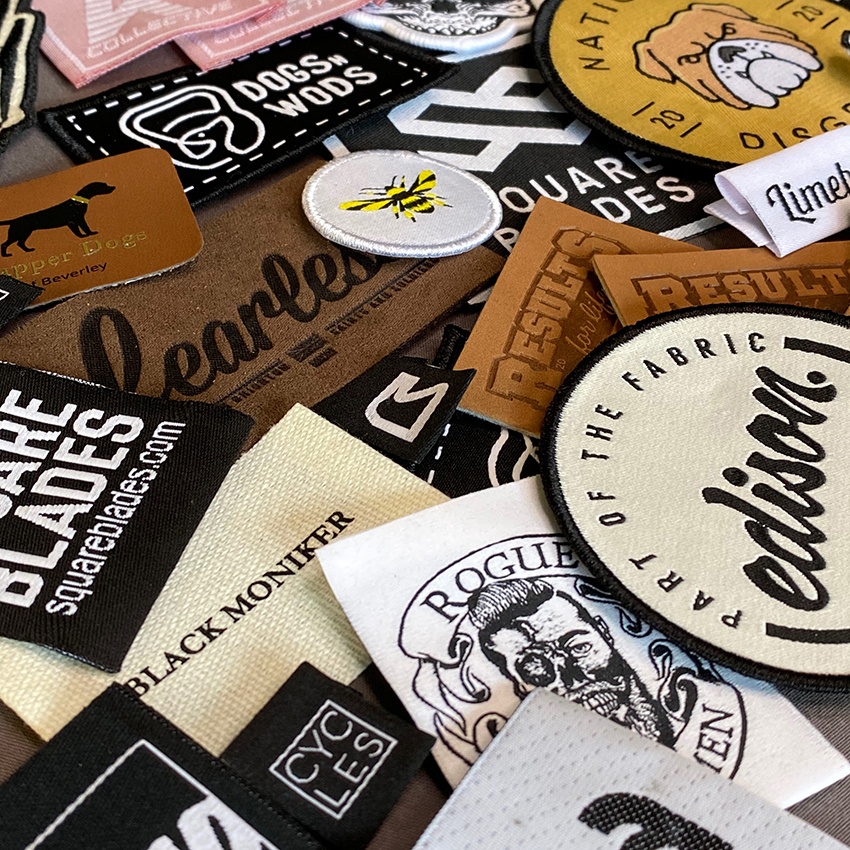
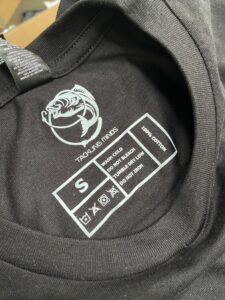
Label Removal & Printed Neck Tags
Our most popular re-branding service: We carefully remove the brand label and print your custom design inside the neck. Although many brands such as Stanley & Stella or Continental Clothing don’t have branded labels inserted in the neck, only a size tab. Get in touch for more information. Some tagless garments have printed labels inside the collar. Unfortunately these can’t be removed.
Label Removal & Sewn Neck Tags
Custom tags sewn into your garments is another great way to make your brand stand out and one of our most popular garment finishing services! We sew in 3 standard positions. Inside neck, sleeve or bottom hem. Manufacturers labels can be cut out and a new labels sewn in place. Or, for the best possible finish, manufacturers labels can be unpicked and your own labels professionally sewn in place.
Flood does not manufacture labels or tags. If you want us to source labels for you, we can. MOQ's start at 500pcs. We can also recommend UK based manufacturers and you can ask to send the labels to us and we’ll keep them in stock for you. If you can, send 10% overage to allow for imperfections, losses and occasional errors.

Hang Tagging
Retail garments may need to be hang tagged so they can go directly into shops or on to your customers. If you want us to supply hang tags, just let us know. Please supply us with tags and we will insert them onto each of the garments we’ve printed for you.
Folding & Bagging
For the ultimate finishing touches, have your garments folded and bagged so they’re totally retail ready. This service also keeps them clean while they’re being transported or stored. We also add a sticker to each bag so you can easily identify sizes.
All garment finishings can add 2-3 days onto turnaround times.
8 Tie-Dye Patterns That You Can Make At Home (Video Tutorials)
8 Tie-Dye Patterns That You Can Make At Home (Video Tutorials)
Making tie-dye patterns is a fun and simple way to create your own clothing or to add some new life to your wardrobe. Whether you’re a tie-dye expert or a complete beginner, these video guides will help you create amazing patterns that will blow away your friends and family.
I took many years of running our screen printing company to perfect our t-shirt prints but tie-dye requires no experience at all. Each of these tie-dye projects can be done at home with just a number of cheap materials and tools—most of which you will already have!
What you will need
All of these patterns require different tying techniques, but they all use the same equipment. Before you get started, make sure you have the following supplies:
- A plain white t-shirt or plain coloured fabric
- A large plastic tub, shower or bath
- Gloves
- Soda ash
- Fork or tweezers
- Rubber bands
- A wire rack (such as a cooling rack)
- Washable marker (optional)
How to make tie-dye patterns
Tie-dying works by bunching up white coloured fabrics and ‘tying’ them. By adding dyes to these fabrics, you can create psychedelic designs. The iconic tie-dye look is created by making folds and creases in the fabric. By restricting where your dye can leave pigment on your fabric, the dye will only spread in very specific areas, creating beautiful, symmetrical patterns.
Before we get into the designs, let’s take a look at the step-by-step process of tie-dying. Every tie-dye project is different, but the process is fundamentally the same. Read through how to make tie-dye patterns before you check out some of the awesome designs listed further down this page.
Preparation:
Before you do anything with your t-shirt or fabric, you’ll need to soak your chosen material in soda ash. Make a solution of warm water and soda ash, using a cup of soda ash per gallon of water. Leave it to soak for about an hour and allow it to dry until it is barely damp.
Step 1 – Bundle & Fold Your Fabric
The way you need to bundle your fabric depends on what design you are looking to create. For specific ideas on folding/bundling ideas, take a look at the methods further down on this page.
Step 2 – Tie Your Fabric
With your fabric folded all properly, take your elastic bands and stretch them around your fabric. The aim here is to maintain the shape of your bundle and prevent it from moving. Around 4 or 5 bands will do the trick.
Step 3 – Die Your Fabric
Now for the fun part! Take your dye or dyes and squirt it over specific areas depending on which pattern you’re looking to recreate.
Step 4 – Rest Your Fabric
Now you need to rest your tie-dye creation for at least 24 hours. If you remove your fabric before 24 hours, then your pigment will not be fully processed and you can potentially ruin your design. While you might want to see your artistic handiwork, the longer you wait the better! Place the dyed fabric into a container, preferably with a lid, in a warm spot that is room temperature (roughly 70 degree fahrenheit or 21 degrees celsius). Allow it to rest.
Step 5 – Rinse Your Fabric
Once your fabric has processed for at least 24 hours, you then need to rinse off any excess pigment from your fabric.
In a tub, shower or bath, take the fabric with the area that has the most white pointing upwards, so you avoid any pigment runoff going onto the white. Wash the white area with cold water and rinse it well. Squeeze any excess dye from the pigmented area of your fabric with a glove. Slowly increase the warmth of the water as you rinse. After around 5 minutes of rinsing, take off the rubber bands and unbundle your fabric. Rinse the whole fabric thoroughly now, still increasing the heat of the water. At this point you can twist and squeeze your fabric to get as much soda ash out as possible.
Step 6 – Wash Your Fabric
Create a tub of hot, bubbly water with dish soap/washing up liquid. Leave your fabric to sit in the water for about 45 minutes before coming back and replacing the contents of the tub with a new batch of bubbly water. Then, repeat for another soak for another 30-45 minutes. This process gives your tie-dye creations bolder differences between the white and dyed areas.
Step 7 – Dry Your Fabric
With your fabric thoroughly washed, it’s time to dry it out so it’s ready for use. You can either choose to let it air dry or use a dryer on a low-heat setting.
Here’s a tip to remember the basic process: bundle, tie, dye, dry!
And now for the patterns…
8 Tie Dye Patterns With Video Tutorials
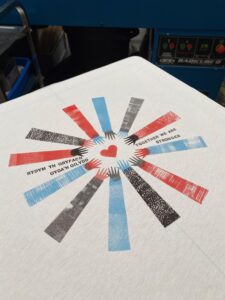
Red, White & Blue Spiral Tie-dye
Get patriotic with this red, white and blue tie-dye design!
Turn your shirt inside out and create a spiral starting the centre with a fork. Hold the spiral in place with bands. Divide your scrunched spiral into 8 equal sections. Colour 2 adjacent areas in blue. Then colour the two spaces opposite your blue dye in with red dye. Add a small amount of water to the 4 remaining white areas. Repeat the same process for the underside.
Simple Scrunch Ice Tie-dye Shirt
This design is great for beginners. Simply take your shirt and make lots of scrunches all over to create lots of folds. Then hold the shape using rubber bands or string. Place the fabric in a tub and pour ice cubes over it. Depending on your chosen colour, add the different dyes on top of the ice, as well as a sprinkle of soda ash on top. Add extra ice cubes on top when finished. Allow to sit for at least 24 hours before rinsing and drying.
Rainbow Peace Symbol Shirt
This design shows off the true psychedelic and hippie roots of tie-dye clothing.
Fold your t-shirt in half, connecting one sleeve to the other. Mark the fold point if you’re using a washable marker. Maintaining the fold, find where you’d like your peace symbol to be in the centre of your shirt. Make a mark at a 60 degree angle from the central point (use a protractor to help).
Using the two marks you made as a reference, take the lower end of the shirt and fold it over to the 60 degree line to make a triangle fold. Then, take the left corner of the triangle and fold it halfway back, leaving you with a smaller triangle fold. Now fold the remaining left side of your shirt over to the right to make a symmetrical shape. Follow the video to see how you should fold the fabric in order to create the peace symbol.
Ice Dyed Scrunch Tie-dye
This design uses simple scrunches and ice for a super simple tie-dye project.
Turn your shirt inside out and begin to make random scrunches and folds in your fabric. Once the folds have been created, scrunch up the fabric slightly so you can transport it to a small container. Press the fabric down so it fits tightly in the container.
Randomly apply your dyes in layers on your fabric. Once your dye has been applied, add an extra sprinkle of soda ash on top. Now ice cubes on top of your fabric, layering it so that it covers the fabric completely. Allow to sit for at least 24 hours.
Ocean Waves Tie-dye Shirt
Using a cylindrical object such as a rolling pin or piece of pipe, roll your shirt going from the bottom left corner to the top right. As you roll and your cylinder is covered, scrunch up the sides into the middle of the cylinder. The aim is to create as many wrinkles as you can. After repeatedly rolling and scrunching, you should be left with a tight bundle around the cylinder. Hold the shape in place.
Half & Half Ice Tie-dye
Scrunch up your fabric as shown in the video below and secure the shape with string or rubber bands. To create a 50/50 design, place your fabric on a rack inside of a large container. You want the rack to be pointing at a slight downward angle. This will let the dye run off one half, leaving the other half white (hence ‘half & half).
Then dye your fabric in your desired fashion and then a sprinkle of soda ash and some ice cubes on top of the dyed area. Leave for 24 hours and wash out.
Rainbow Arrow Tie-dye
Fold your fabric from the bottom to the top. Visualize or draw a diagonal line across the shirt and begin to scrunch up the fabric, making lots of fan folds along the line. Secure with bands or string. Follow the video below to see how to use dyes to create the rainbow arrow effect.
Blue and White Spiral Tie-dye
This design works in the same way as the red, white and blue design above. However, you’ll want to dye your fabric in 6 sections. Each section should follow the pattern of blue, white, blue white. For a detailed explanation, check out this video.
Tips for making tie-dye shirts:
How to keep white areas white – You can help to keep your pigment from bleeding onto the areas you want to be white by adding water. Take a small dye bottle and add water. When applying your dye, add water to the sections that you’d like to be white. This helps to keep your designs from bleeding.
How to keep your pigment from spreading – It might be tempting to pour on as much pigment as possible, but by adding too much you run the risk of the pigment not absorbing into the fibres and spreading into white areas of your fabric. The best thing to do is to cover your fabric in an even coating of dye without any excess buildup.